stackdome-install takes one bare Linux server to a working dashboard and API, with local compute already connected. It also creates the platform database, an image registry, and an admin account you can sign in with. The installer runs unattended in numbered phases and waits for each component to become ready before moving on.
This page covers the user-visible installation outcome first, then the infrastructure it creates and the exact installer controls.
Prerequisites
The installer runs a preflight check and refuses to continue unless all of the following hold.
Two more things matter but are not enforced up front:
- Ports 80 and 443 open for inbound traffic. After installing, the installer fetches
http://<your-domain>/healthand warns you if the dashboard is not reachable from the internet. Open them in your firewall or cloud security group beforehand and you avoid the warning. - Capacity. The installer warns, without stopping, if the server has fewer than 2 CPUs, less than 4 GB of RAM, or less than 20 GB of free disk on
/. Treat those as the practical floor.
Flags
You need thestackdome-install binary built for your server’s platform — Linux on amd64 or arm64.
With the binary on the server, give it the execute bit and run it as root:
install subcommand is optional for backward compatibility, but using it makes the operation explicit. The sudo is not optional. Without root the installer exits during preflight and tells you to re-run it with sudo.
The GitHub flags are optional. Values you provide are stored in
stackdome-bootstrap-secrets and reused by later upgrades; a later non-empty flag replaces its stored value. Everything else the installer needs — the database password, JWT signing secret, encryption key, and your admin password — it generates for itself.
DNS
For a trial: nothing to do
Leave--domain off and the installer builds a domain from the public IP it detected: stackdome.203.0.113.10.nip.io for a server at 203.0.113.10. nip.io is a public DNS service that resolves any hostname containing an IP address straight back to that IP, so the name works the moment the installer picks it. No records to create, no propagation to wait for.
For a domain you own
Create anA record for the name you intend to pass to --domain, pointing at the server’s public IP, and let it propagate before you run the installer:
<generated-prefix>.<resource-name>.stackdome.example.com. Those application hostnames have to resolve to the same server, so a single A record for the dashboard is not the end of the DNS work.
Domains and TLS
The records to create for application hostnames, and how custom domains work once you are running.
What the install creates
On the server
- A k3s pod limit, written as
max-pods=250in/etc/rancher/k3s/config.yamlwhen that file does not exist. If the file already contains amax-podssetting, the installer keeps it. If the file exists without one, the installer warns and does not overwrite it. - k3s, installed if the
k3sbinary is not already present, with Traefik disabled in the k3s installer because the Stackdome chart supplies routing. Its kubeconfig is/etc/rancher/k3s/k3s.yaml(mode0600). If k3s is already installed, the binary installation is skipped; when the installer has just created the config above, it restarts k3s. It then waits up to two minutes for the node to reportReady. - Helm, installed if
helmis not already on thePATH.
In the cluster
Namespaced installation resources land instackdome-control-plane: the chart workloads, ServiceAccount and token Secret, bootstrap Secret, Volume, Stack, and StackResources. The installer also applies cluster-scoped resources: the chart’s CRDs, stackdome-api-server-role ClusterRole, stackdome-api-server-role-binding ClusterRoleBinding, and, for a real domain, the letsencrypt-prod ClusterIssuer. Those cluster-scoped resources do not belong to any namespace.
- The
stackdome-agentchart, installed fromoci://quay.io/stackdome/charts/stackdome-agentat the version selected by--chart-version. Before upgrading, the installer server-side applies every CRD shipped by the chart. It then runshelm upgrade --installand waits for the chart and operator pods to be ready. If that exact chart version is already deployed, it skips the chart upgrade. - A bootstrap Secret,
stackdome-bootstrap-secrets, holding the credentials the installer generated: the database password, the JWT signing secret, the encryption key, your admin password, plus your admin email and the domain. - RBAC for the API server: a
stackdome-api-server-accountServiceAccount, thestackdome-api-server-roleClusterRole and binding, and the long-livedstackdome-api-server-account-secrettoken Secret. The role can manage Stackdome stacks, resources, volumes, users, registries, and Postgres addons; observe build and cluster status; create a cluster issuer and CNPG image catalogs; manage the namespaces and Secrets those workloads need; and read pods, logs, Services, nodes, and pod metrics. - A
Volume,stackdome-db-data— 10Gi,ReadWriteOnce, storage classlocal-path— backing the platform database. - A
Stack,stackdome-platform, grouping the two resources below. - A
dbStackResourcerunningpostgres:16-alpineon port 5432, not exposed publicly, with the volume mounted at/var/lib/postgresql/data. - An
api-serverStackResourcerunning the image from--image. It runs database migrations as an init step, then serves on port 8000, exposed publicly at your domain. - A
ClusterIssuer— only when you install on a real domain. See TLS below.
/health endpoint for up to five minutes before continuing.
In Stackdome
With the API server up, the installer finishes the setup through Stackdome’s own API:- An admin user named
Platform Admin, with the email from--emailand the generated password. - An organization named Default, with your domain configured on it.
- A cluster named local — the server itself — registered with the credentials from the RBAC step, so the platform can deploy to it.
- An in-cluster image registry named
default-registrywith 50Gi of backing storage, attached to that cluster. It holds the images Stackdome builds from your git repositories.
The in-cluster registry belongs to the cluster and is created with it. It is not one of the entries on the Image registries page — that page is for credentials you add for external registries, and it is empty on a fresh install.
Sign in and confirm the dashboard
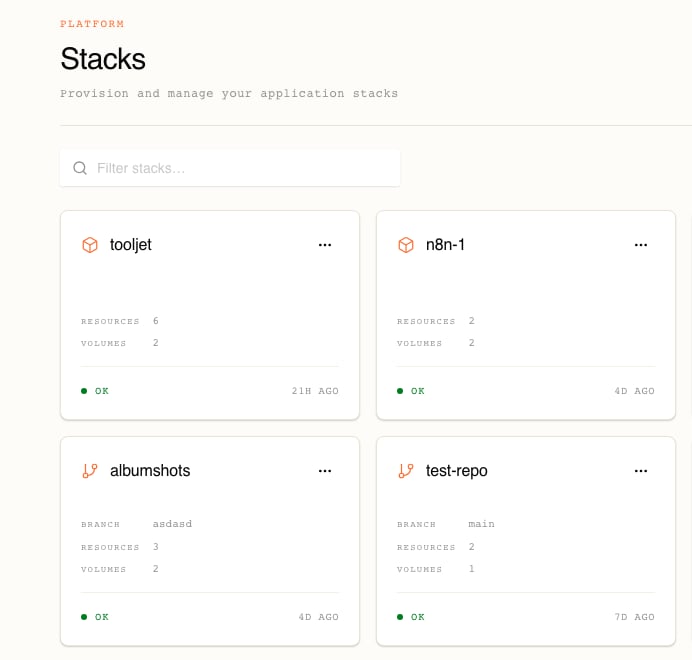
Open the dashboard URL from the installer summary. Sign in with the email passed to--email and the generated admin password that you saved from the summary.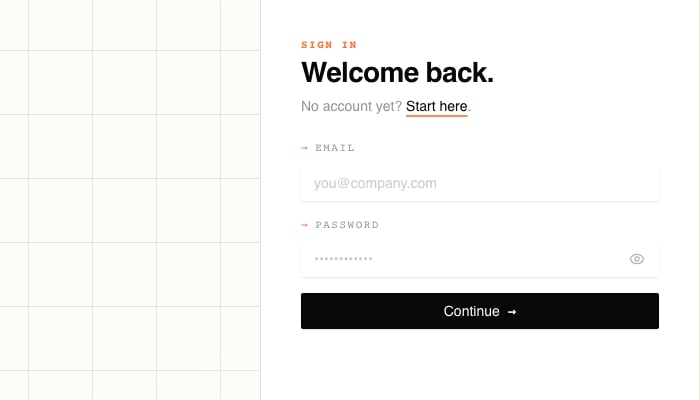
TLS
What the installer does about certificates depends on the shape of your domain. A domain ending in.nip.io, .sslip.io, .local, or .localhost is classified as a non-TLS domain; any other non-empty domain is classified as a real one.
On a nip.io or other local-style domain
No ClusterIssuer is applied and no Let’s Encrypt certificate is requested. The api-server resource is created with tls: false on its public port and without a cluster-issuer annotation. The chart’s Traefik ingress therefore serves its default self-signed certificate.
The final summary still prints an https:// URL for the dashboard. Because the install configured no certificate for that name, treat a browser certificate warning on a trial install as the expected outcome rather than a sign that something went wrong.
On a real domain
The installer applies aClusterIssuer named letsencrypt-prod, and annotates the api-server resource to use it with tls: true on its public port. The issuer is configured with:
- ACME server: Let’s Encrypt production,
https://acme-v02.api.letsencrypt.org/directory - Contact email: the address you passed to
--email - Account key stored in a Secret named
letsencrypt-prod-key - An HTTP-01 solver, so validation happens over port 80 on your hostname
Even once the issuer is applied, the installer does not wait for, or verify, that a certificate was actually issued. If HTTPS on your domain still shows a certificate error after the install finishes, inspect the
ClusterIssuer and Certificate resources in the cluster rather than re-running the installer.Upgrade an existing install
Use the dedicated upgrade command for a version change:upgrade requires root, a running local k3s service, a usable /etc/rancher/k3s/k3s.yaml, Helm, the stackdome-agent release in stackdome-control-plane, the bootstrap Secret, and the existing api-server resource. It reads the email, domain, database workload type, and secrets from the existing install. If you omit --image, it keeps the deployed API-server image. GitHub flags are also accepted and update the stored credentials; values you omit are reused.
Re-running installation
Re-running with the same flags is handled at every step, and the installer says so as it goes:
Two more consequences are worth knowing before you rely on this:
- Do not delete
stackdome-bootstrap-secrets. Reuse depends on it. If it is gone or incomplete, the installer generates a fresh database password, JWT secret, encryption key, and admin password — against a database and an API server that were set up with the old ones. - Changing
--domainor--imageon a re-run changes the cluster. Theapi-serverresource is re-templated and re-applied with whatever you pass, and a domain that is not already on the organization is added to it. A re-run is not a no-op if the flags differ.